
Frequently Asked Questions
Should Hyper-V Have USB Passthrough?
First and foremost, Hyper-V is a server-based solution. Beyond that, Microsoft is wholeheartedly embracing cloud concepts, even (in my opinion) to the detriment of a great many other technologies. If you envision a cloud based on virtualization, even an on-premises cloud, you can see fairly quickly that host-based USB is a terrible idea. You never have any guarantee of any kind where a virtual machine will be running from moment to moment. With Shared Nothing Live Migration, even the lack of a cluster no longer locks a virtual machine to a specific host. Host-based USB just doesn’t make a lot of sense in a cloud.
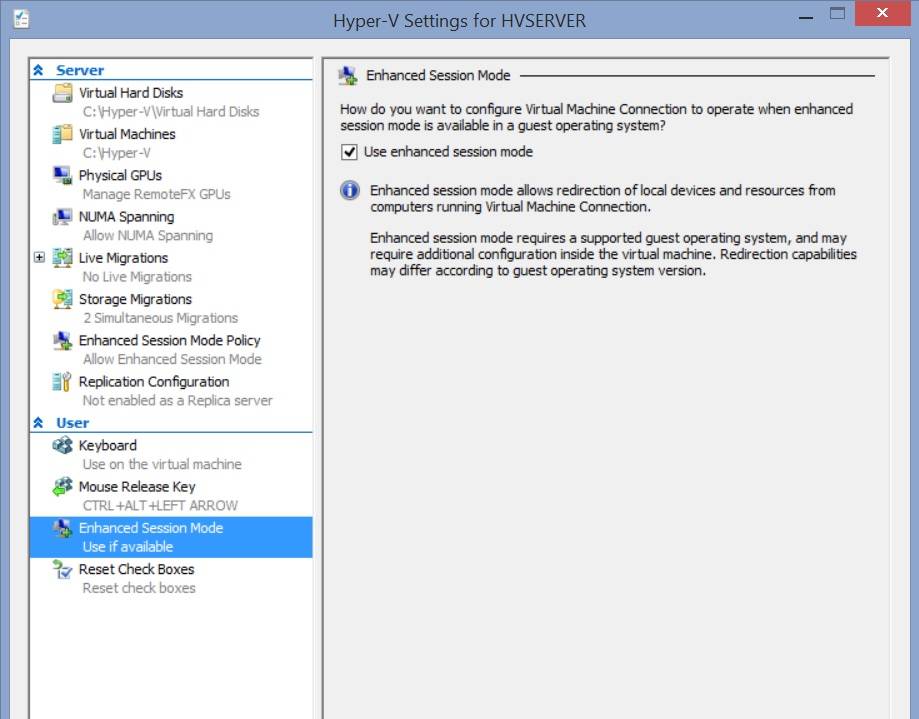
How to Enable Enhanced Session Mode
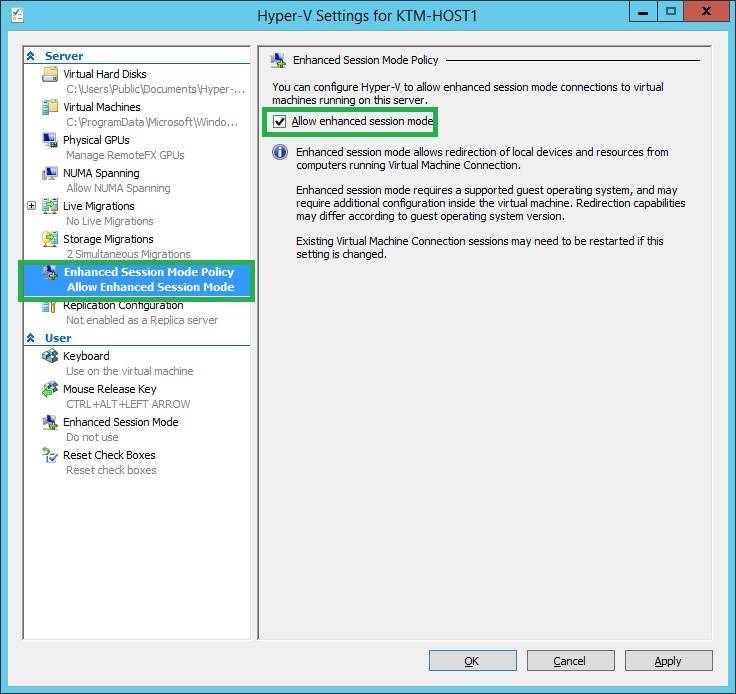
Client Hyper-V installations automatically enable Enhanced Session Mode. For the server SKUs, you need to enable it manually. Afterward, you need to restart the Hyper-V Virtual Machine Management service (vmms). The quickest way is with PowerShell:
Set-VMHost -EnableEnhancedSessionMode $true
That cmdlet includes the -ComputerName parameter if you’re running it remotely.
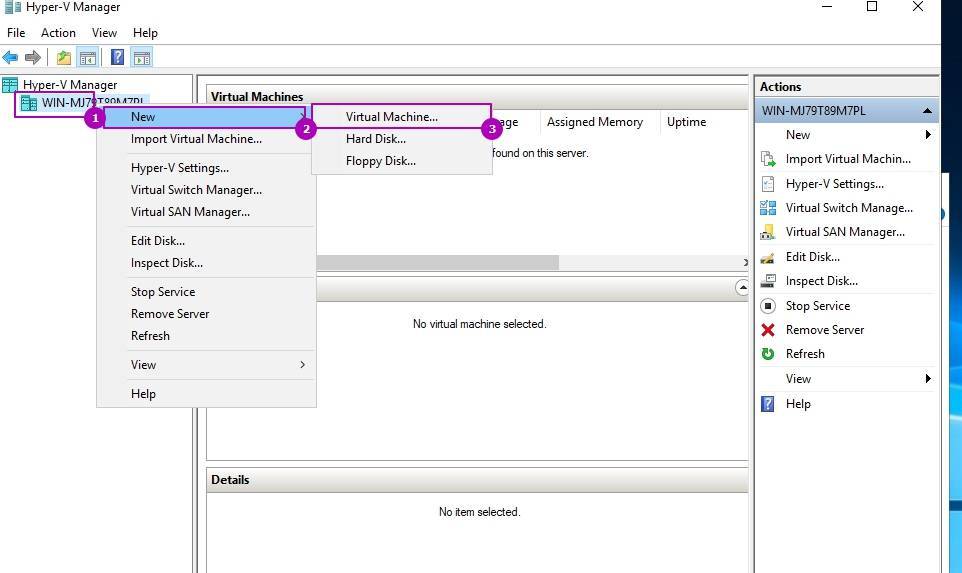
If you prefer Hyper-V Manager:
Right-click on the host in the left pane. Click Hyper-V Settings.
In the left-side tabs, click Enhanced Session Mode Policy.
Check the box for Allow enhanced session mode and click OK.
How to Add Hyper-V Passthrough Support for USB Drives
Hyper-V can set up most USB disk drives in passthrough mode, but it does so via Windows’ storage subsystem. As I said in the opening paragraph, only one component can communicate with a USB device, so the Windows disk subsystem brokers I/O for all USB storage devices. For this reason, Windows must identify your USB drive as a “Mass Storage Device” in order for it to connect in passthrough mode. Other USB storage devices will not work.
I would like to reiterate that I am fundamentally opposed to permanently mounting any disk in passthrough mode. However, this is a how-to article, so I will show you how to. If you have problems, expect all responses from me to be, “I told you so”. I do not have any USB drives to test this with, so my screenshots will not line up well, unfortunately.
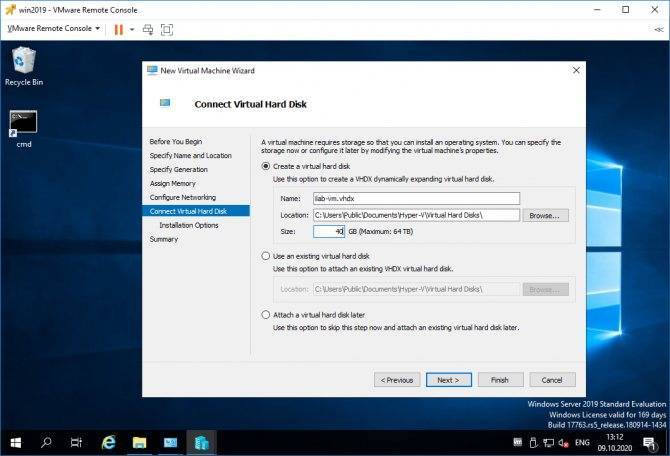
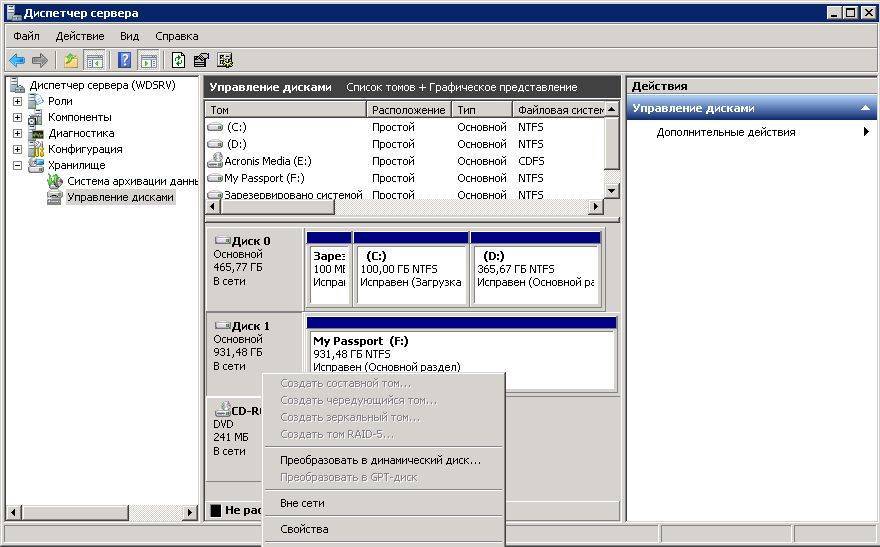
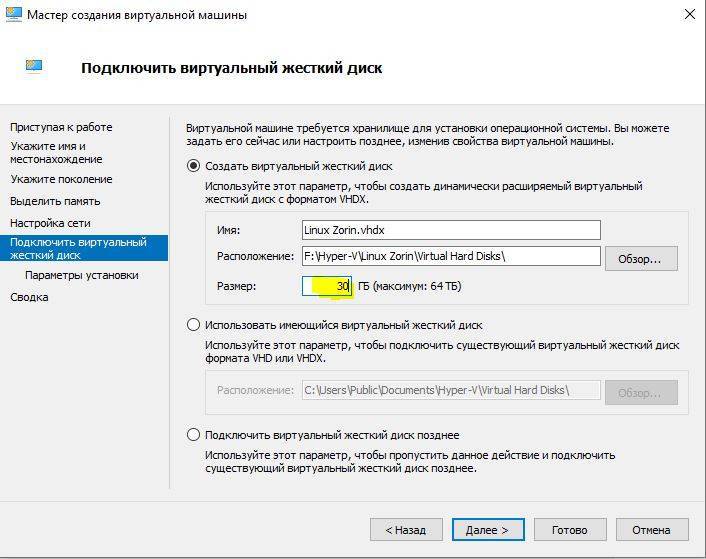
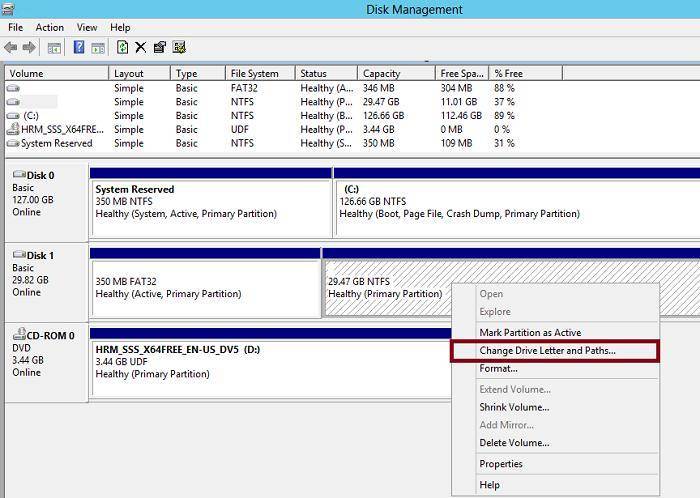
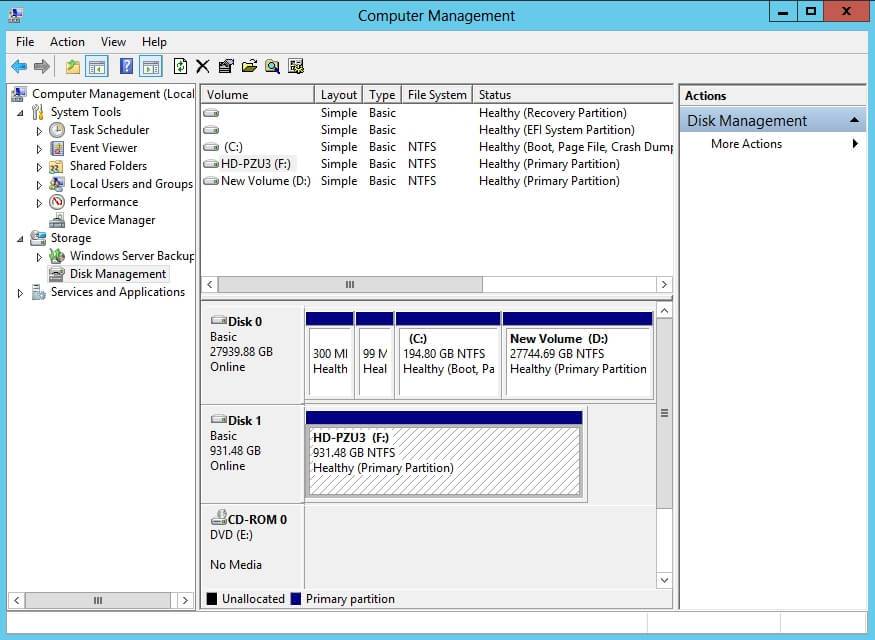
Ensure that the disk is visible in Disk Management. Take it Offline. If the Offline option is not available, the disk cannot be used as a passthrough.
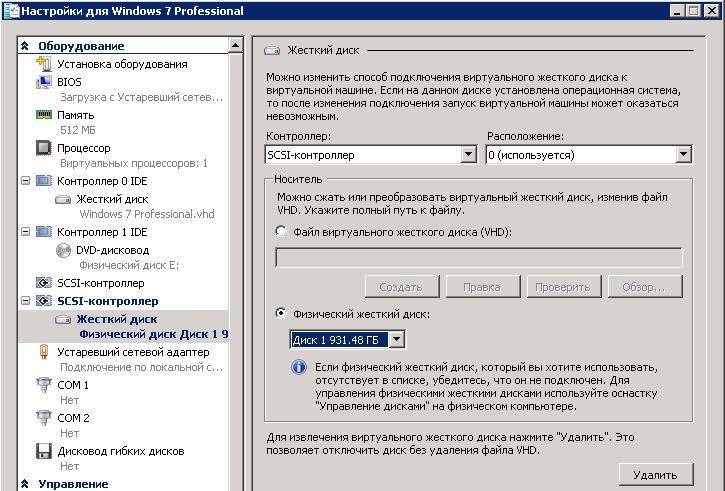
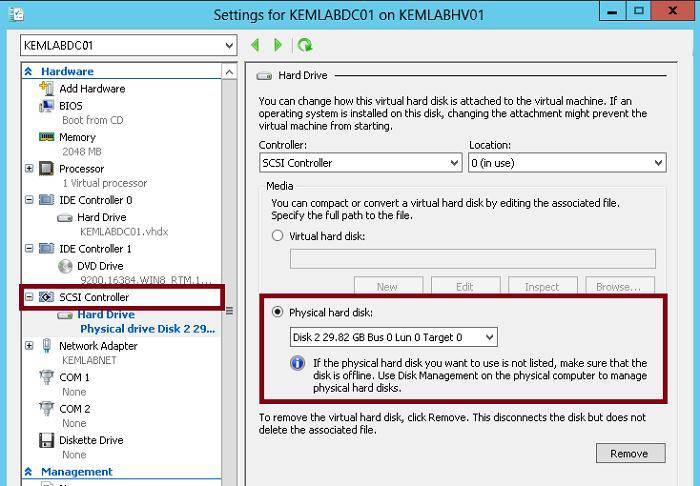
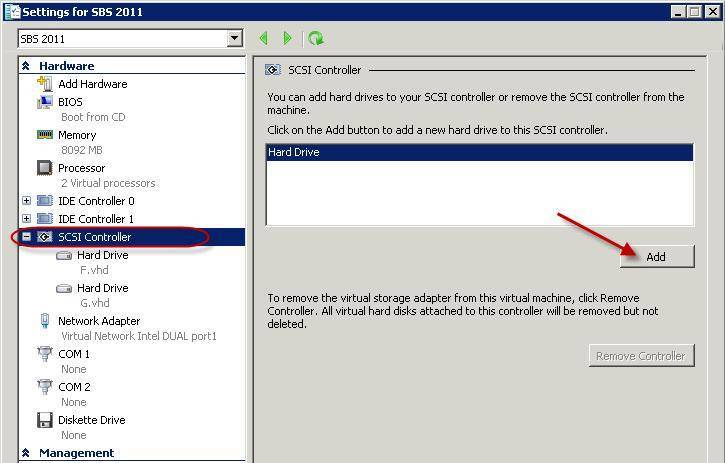
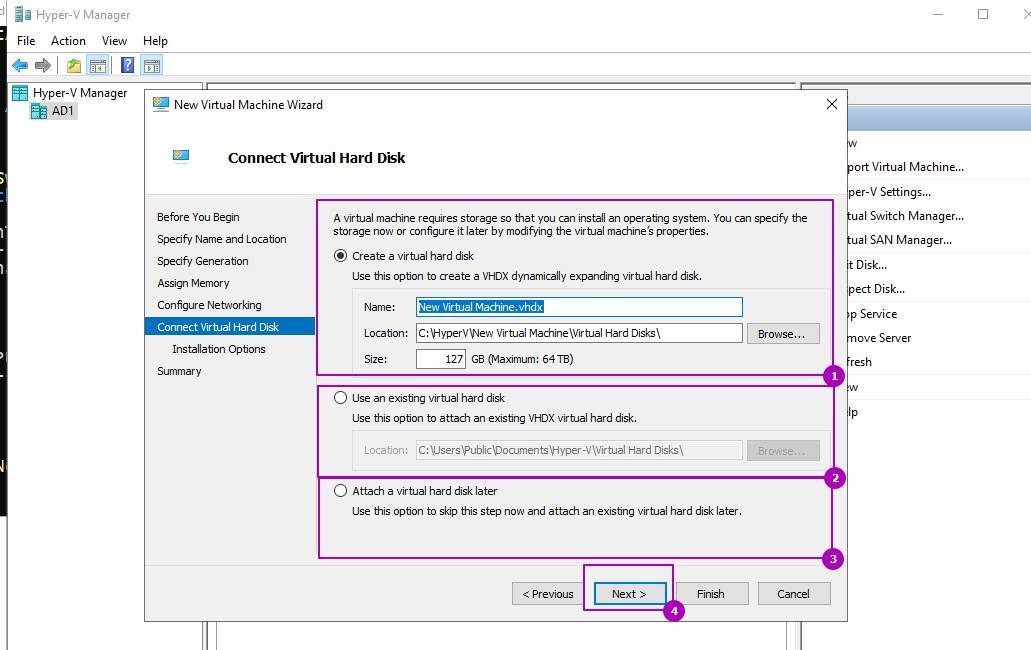
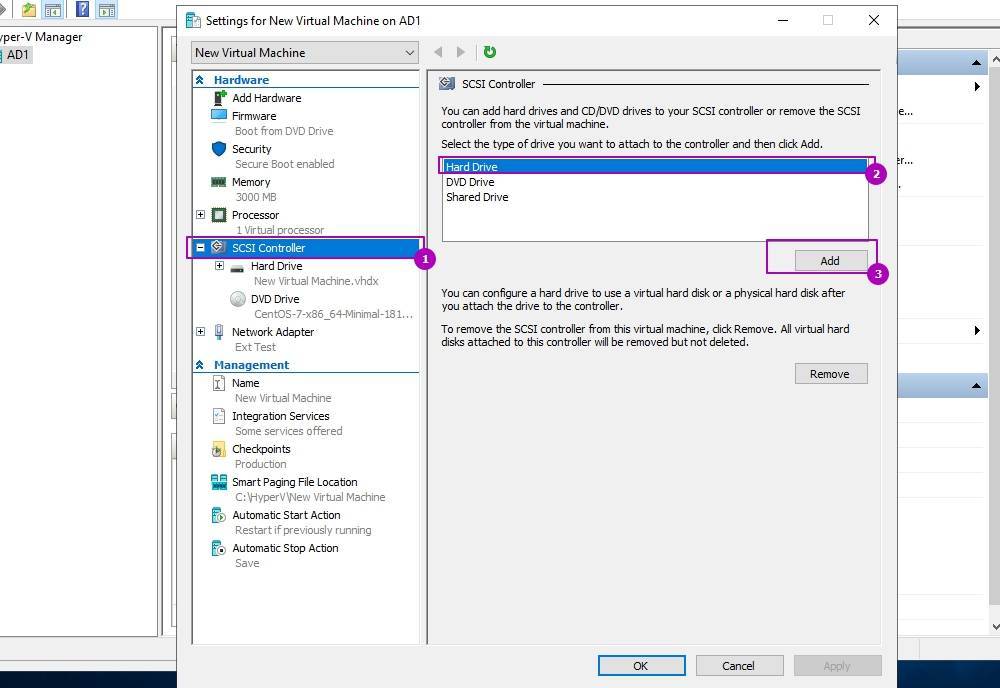
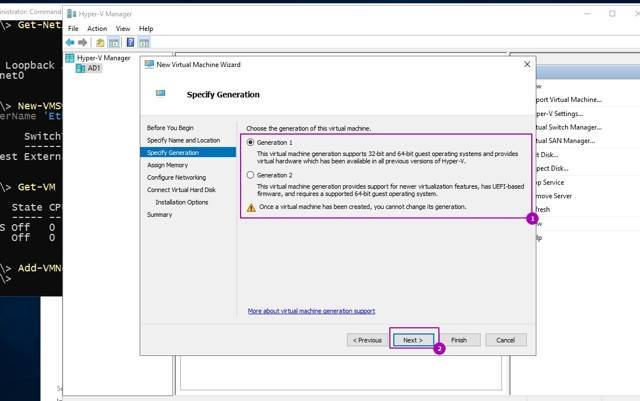
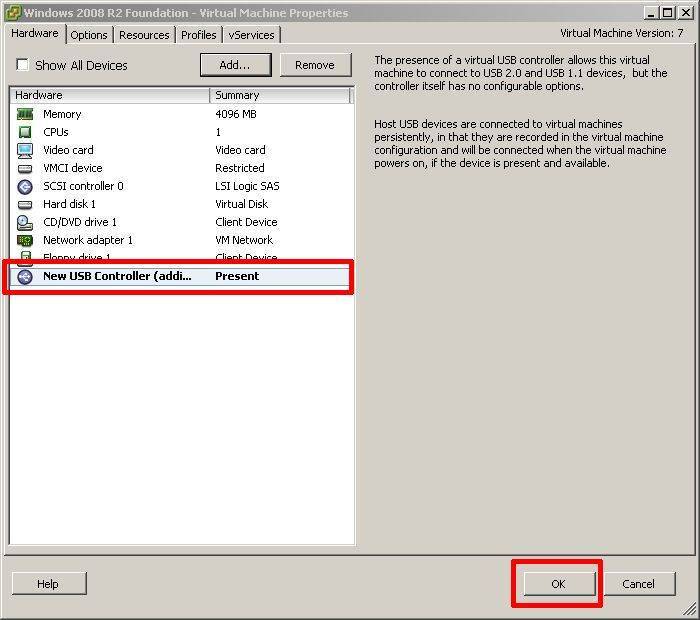
In the target virtual machine’s properties dialog, click the virtual controller where you want to add your passthrough disk. Make sure that Hard Drive is selected on the right and click Add. Remember that you cannot add any drive to a virtual IDE controller while the virtual machine is turned on, but you can add a drive to a virtual SCSI controller if the VM is off or on.
-
Change the selection dot to Physical Hard Disk and then select the drive to attach from the drop-down. Click OK.
Hyper-V Cannot Passthrough Non-Disk USB
I often read complaints that Hyper-V cannot perform passthrough operations for USB devices. The complaint typically accompanies a negative comparison to applications such as VMware Workstation and Oracle VirtualBox, which can perform USB passthrough. The very sharp distinction to be made here is that Hyper-V is a type 1 hypervisor whereas the products that provide simple USB passthrough are type 2 hypervisors. In a type 2 hypervisor, the management operating system is installed directly to the hardware and the hypervisor is just another application that runs within it. Applications have the ability to exclusively capture a USB port to prevent other applications from using it if they like; this is why it’s so easily done in a type 2 hypervisor. If you’ve ever used a type 2 hypervisor in this way, you’ll notice that they explicitly tell you that the USB device can be attached to the parent or a guest — there’s no sharing or divvying up resource access or anything of the sort.
Type 1 hypervisors are not applications. They are kernels firmly entrenched within partitions. A type 2 hypervisor is essentially an application shim that is pretending to provide a root hardware device, which is fine because it doesn’t require the same degree of isolation as a type 1 hypervisor. Hyper-V can’t do this because one operating system instance locking a USB port from all other operating system instances is just not how type 1 virtualization works. Could there be a way for a type 1 hypervisor to assign a USB port to a specific guest by doing the same thing that a type 2 does? I don’t know. In theory, it sounds like something that could be done. But, technological feasibility is beside the point. Hyper-V doesn’t do it. If you want more information, Microsoft has published a thorough article regarding passing through hardware on the 2016 platform that describes some of the challenges and possibilities.
If true USB passthrough is a requirement for whatever you’ve got in mind, then Hyper-V is a poor solution. If you’re using the emulators in Visual Studio, you’re sort of forced into it. For most everyone else, I’d say to turn your eye to a type 2 hypervisor. I personally like VirtualBox. It’s not perfect by any stretch, but the licensing terms are favorable for most and it gets the job done.
All of that said, it is entirely possible to use USB devices inside a Hyper-V guest, even Client Hyper-V.
Note: a fourth option not explored in this article is software-based solutions. I’ve never personally used any, which is why they’re not in the text. Check the comments section, though. Reader Tim has suggested one such application and recounted his own experiences with it.
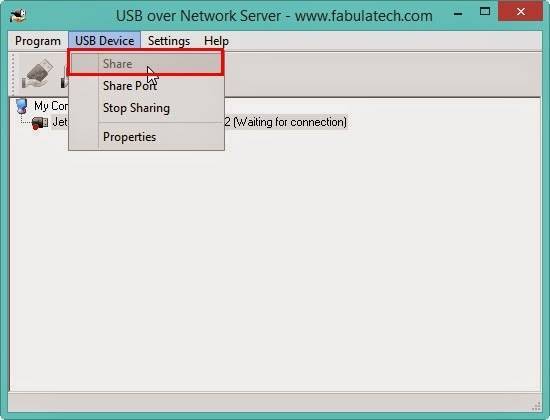

Method 1: Network-Based USB Solutions
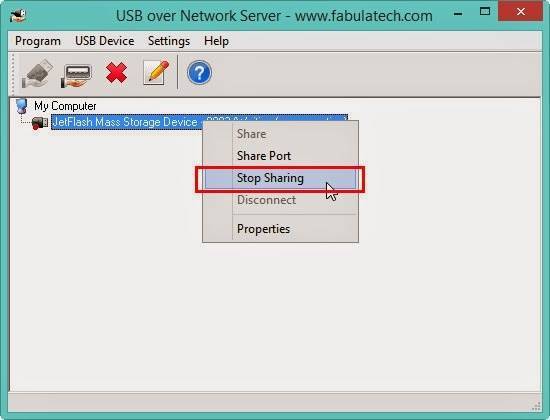
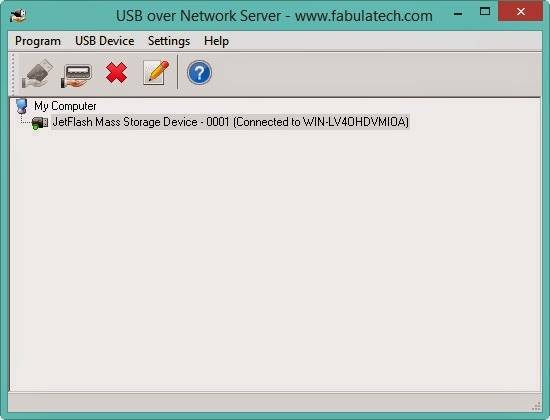
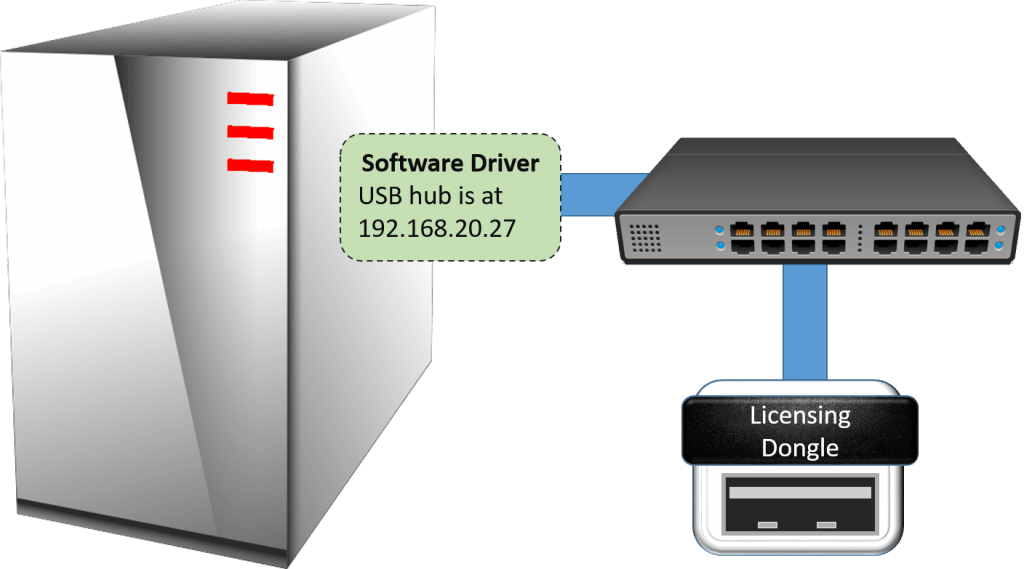
If you need to make a USB device available in your virtualized datacenter, I prefer network-based solutions. Years ago, I used a product sold by Digi. This is not an endorsement per se because I only ever used the one device and have not used any of their current technology, but they’re still around so they must be doing something right. Remember that USB hubs, not ports, match up with operating systems at a one-to-one ratio. Don’t buy a single device with a lot of ports and expect to connect lots of virtual machines.
USB Over Network
Pros of network-based USB hubs:
- Can remain connected to their assigned virtual machine no matter where it moves and whether or not anyone is logged in, provided network connectivity remains constant
- Allows for concentration and management of networked USB devices in administrator-defined locations. For instance, you might purchase a rack shelf and use it to hold all of your network USB hubs, all connected to a switch provisioned just for connecting those devices.
- A perfect solution for nuisance devices such as licensing dongles.
- Widest range of host and guest operating system support.
Cons of network-based USB hubs:
- A 1-to-1 ratio of hubs to virtual machines often means purchasing many empty USB slots
- Gigabit Ethernet is much slower than USB 3+
- Unless your wiring, addressing, routing, and firewall infrastructure allows for it, you may not be able to provide physical device access to end-users
- Drivers for the network-connected USB hub must be available for your guest operating system, as well as for the USB devices plugged into it
- The guest must be connected to the network (could be a limiting factor for VMs that you wish to be isolated)
What I want to make most clear with this technique is that the virtual machine connects to the USB hub via TCP/IP. Hyper-V has no part in it beyond providing fundamental network connectivity via the virtual switch.
Method 2: Remote Desktop Protocol
Once a virtual machine has an operating system installed, it behaves very much like a physical machine. So, you can enable remote desktop connections in the System properties window:

Enable RDP
Once that’s done, you can connect to it remotely just as you would any other Windows system.
To allow USB devices in an RDP session:
- Run mstsc.exe at a Run/command prompt.
Click Show Options:
The dialog box will expand, exposing a number of tabs. Switch to the Local Resources tab and click the More button:
Another dialog will appear. Other devices that it detects will appear here, as will a checkbox for Other supported Plug and Play (PnP) devices. Check items as necessary.
-

Once you click OK and connect to an RDP session on any host, these options will be retained until you change them. There’s also a nifty tool called “Remote Desktop Connection Manager“. It’s kind of buggy and unstable, but its ability to retain many unique connection settings for remote hosts in a hierarchical tree makes it well worth the minor difficulties.
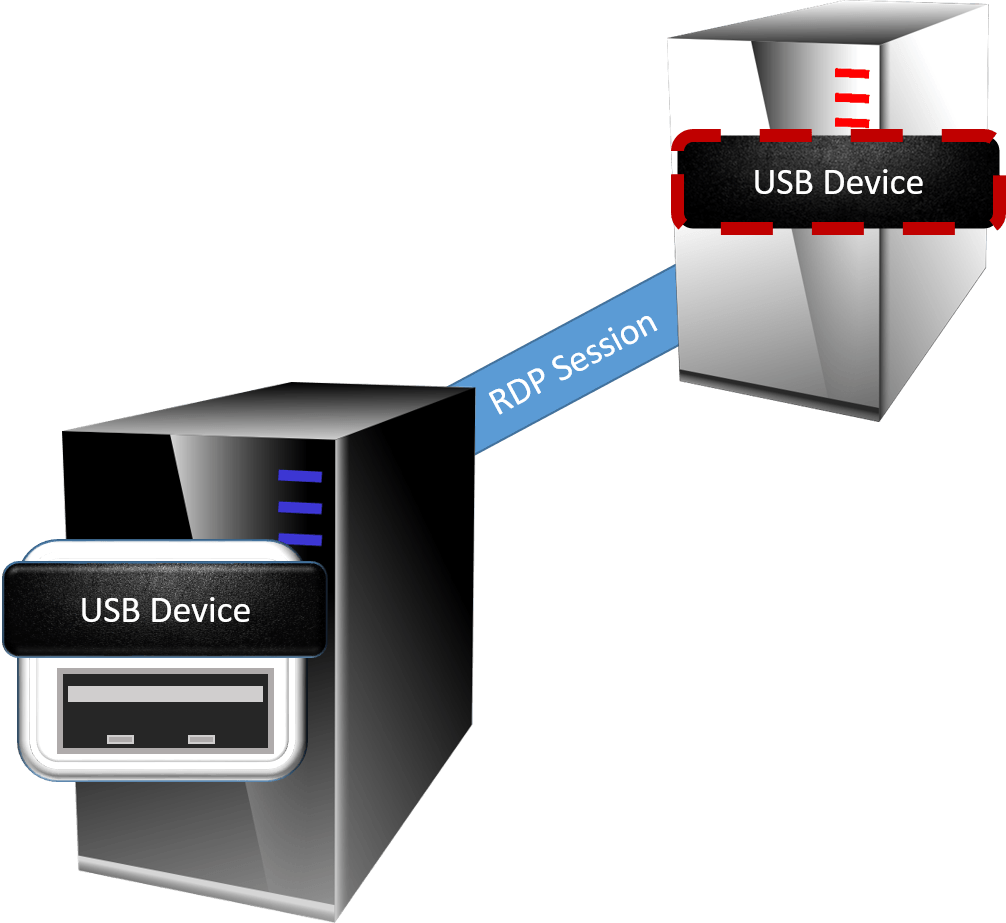
USB Over RDP
Pros of RDP-based USB connectivity:
- Completely hypervisor independent.
- Automatically works when RDP connectivity is enabled
- Can be controlled and limited by group policy
- Any user with a USB device attached to his or her desktop with RDP access to the virtual machine can use that device within the virtual machine
Cons of RDP-based USB Connectivity:
- The device is only connected as long as the RDP session is connected
- Drivers may need to be installed in the target virtual machine
- This feature was originally designed with printers in mind; may not work with all devices
- Connection speeds are commonly very slow
- Because RDP is a requirement, only Windows operating systems are supported
- You must have network connectivity between the system that is physically hosting the USB device and the guest operating system; TCP port 3389 must be opened on any firewalls
The best purpose for USB over RDP is for connecting devices from end-user computers. It’s not functionally different from the way that we’ve been connecting devices in remote sessions (usually Terminal Services) sessions for a very long time.